I have often wondered how to age wood. There are many methods, but I am still unsure which is the best and recommended one. How to age wood will answer all of these questions and more.
It is not uncommon for people to want to alter the look of furniture by looking older. This process can be achieved by sanding, staining, and coating with a sealer. However, you need to do it before staining or sanding to determine what effect you want the wood to have.

For example, a dark or natural wood stain would make an aged-looking tabletop appear as if it had been around for quite some time. You can also use wax and varnish for a more weathered appearance on wooden surfaces that are not porous.
This article has a detailed list of the different methods for aging wood, along with their pros and cons. It also gives a brief explanation of the types of woods that can be aged in each technique, what materials you need for each method, and an easy-to-follow guide on how to age wood using any given method.
Aging Wood Using Steel Wool And Vinegar
Smart, contemporary furniture can be beautiful in its simplicity, but there are times when we crave a hint of age-worn patina to give our spaces personality and warmth. As an avid woodworker, I have seen the power of steel wool in a rustic home and have found it to be an inexpensive, effective alternative to power sanders and sandblasting.

Steel wool can be purchased in bulk at any hardware store, paint store, or lumberyard. This is one reason I like steel wool – it’s so low-effort and still gives excellent results.
Here’s what you’ll need to try out this technique:
- Steel Wool
- Vinegar
- Water (optional) – if you want the surface to be more rustics with lots of pit marks from the steel wool. If you want a softer finish, skip the water. I would recommend not using too much water to dilute your vinegar/steel wool and make it less effective.
- Sandpaper (optional) – I use 100-Grit sandpaper for a more disruptive finish. Use whatever you have on hand. Just make sure that you’re wearing protective eyewear!
- A clean rag to wipe the edges of the area you are working on and a spray bottle with vinegar to mist your steel wool.
Start by lightly rubbing steel wool over the area to be sanded until it has a slight patina to it, but make sure not to scratch or damage the wood. This is where using old rags or an old t-shirt will help keep scratches off of your surface. If you have deep marks in the wood, use 100-Grit sandpaper to get the deeper scratches out.
Once you’ve prepped the area, hold the steel wool against the wood using a clean rag and mist it with vinegar. I like to spray it a little and then rub it lightly across the surface with my moistened steel wool.
The trick is not to let your steel wool get too wet, as this will dilute your vinegar/steel wool solution and make it less effective. In essence, you want your surface to look like it’s rusting without actually getting wet (this is where having a spray bottle with vinegar comes in handy). If your surface is getting wet, wipe away the excess vinegar.
Let the vinegar/steel wool sit on the wood for about 3-5 minutes. If you want to achieve pit marks in your wood, you can use this time to move on to a new area and to let the solution do its magic.

After letting your solution sit on the wood for 3-5 minutes, rinse it off with water, and then use a clean towel or rag to pat off any excess water/vinegar. Allow it to dry thoroughly.
What you’ll end up with is a beautiful antique-looking patina that doesn’t require heavy sanding and power tools. Your surface will still be intact, and it will just have an aged look to it – much like the original finish on reclaimed wood.
Aging Wood Using Stains And Paints
If you’re looking for new ways to update your home décor, you need to try exotic wood. Painting or staining old wood is a great way to give it new life and change the look of your room.
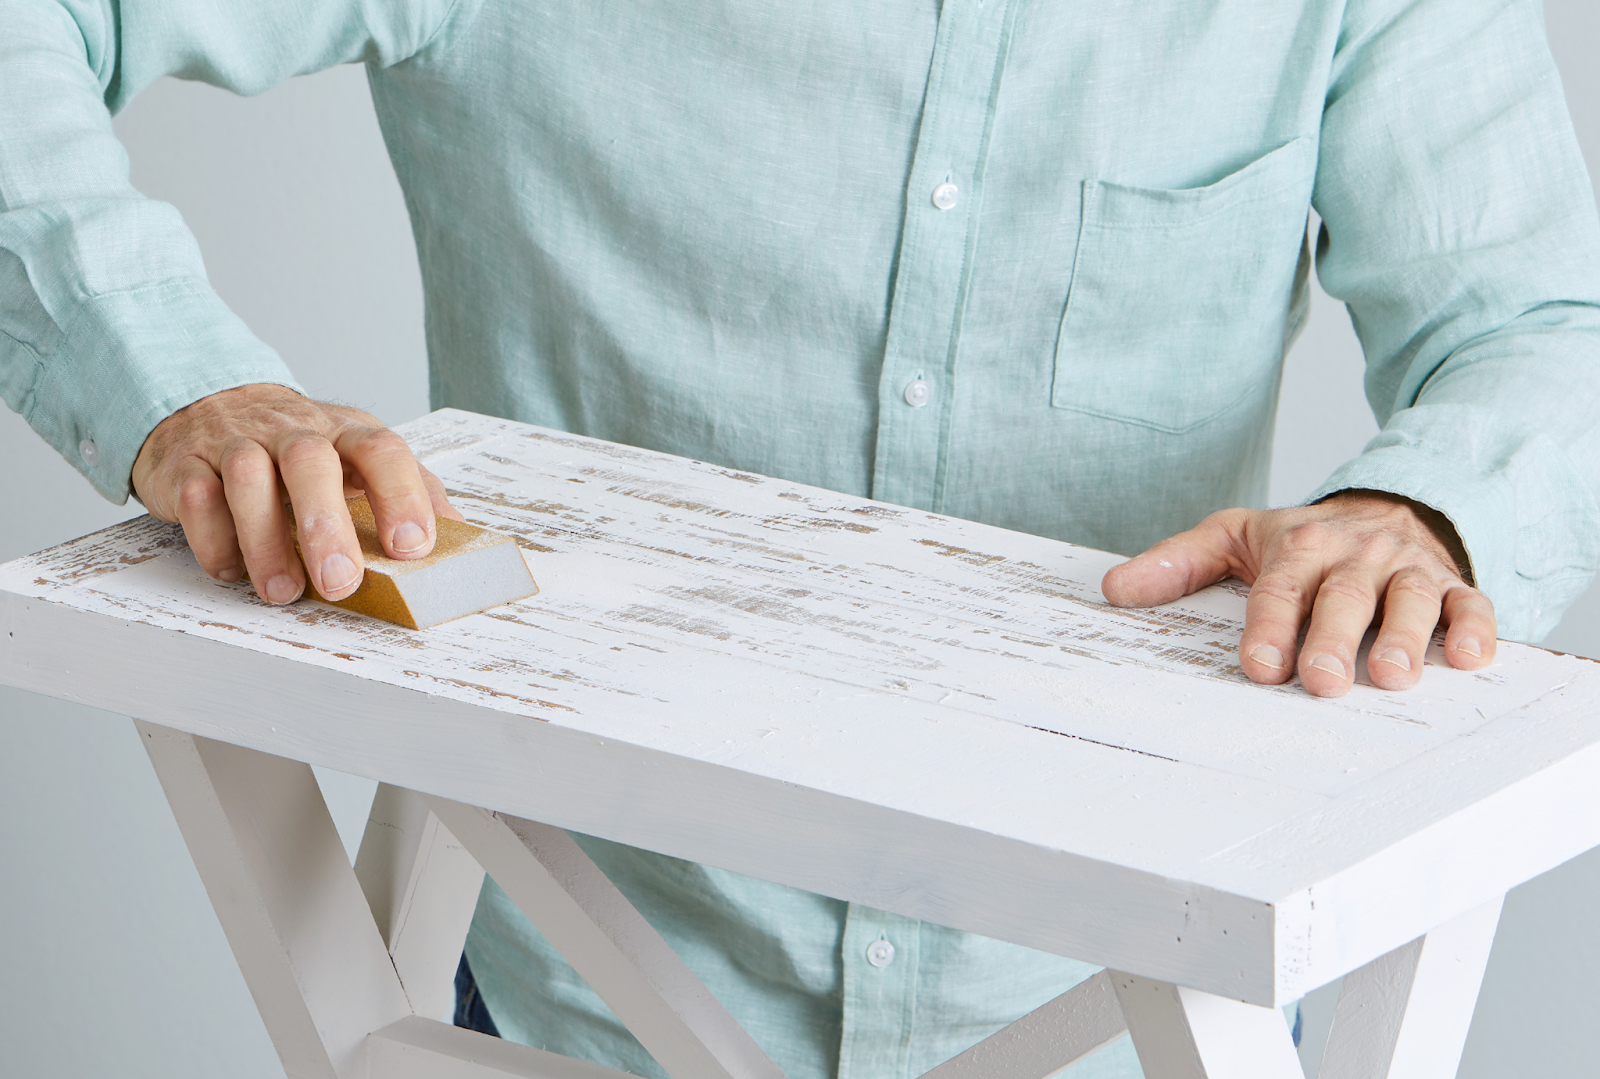
If you have unpainted or unfinished wood, start by sanding off any rough patches or protruding nails before painting. Next, look for splintered areas that need repair and fill them in with a good quality latex filler before painting.

Apply the stain by brush or spray. You can use a cheap and effective filler/primer by mixing white primer with a small amount of tacky primer. You’ll need to test out different ratios first to find out how much primer you need to use, depending on the surface of the wood. When painting, try to keep your brush or sprayer at least 1″ away from the surface of your wood if possible. When applying lighter stains, it is best to start with 1/2 tint.

Let your paint or primer dry for 24 hours. Then, sand down any areas that need to be evened out. After sanding, apply a second coat of paint or primer, then let it dry overnight.
To help protect the stain on your wood, apply a top coat of polyurethane sealer in the appropriate type of finish. The topcoats will keep the stain from bleeding through and protect against chipping, nicks, and scratches. Also, look for products that say they’ll leave a matte finish; this helps prevent your paint from getting chipped by debris or shrinkage when it dries after you apply it.